绘制实心形状
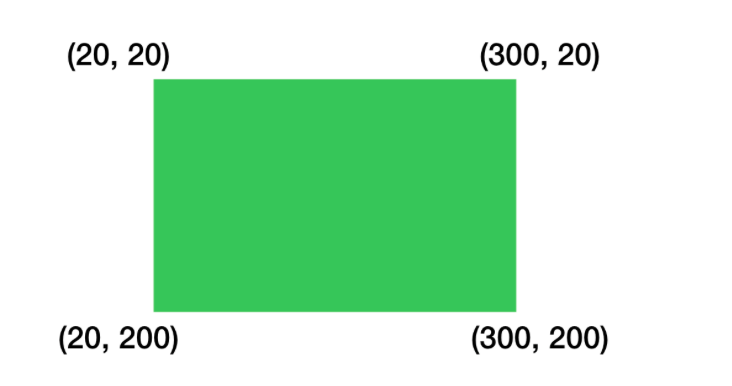
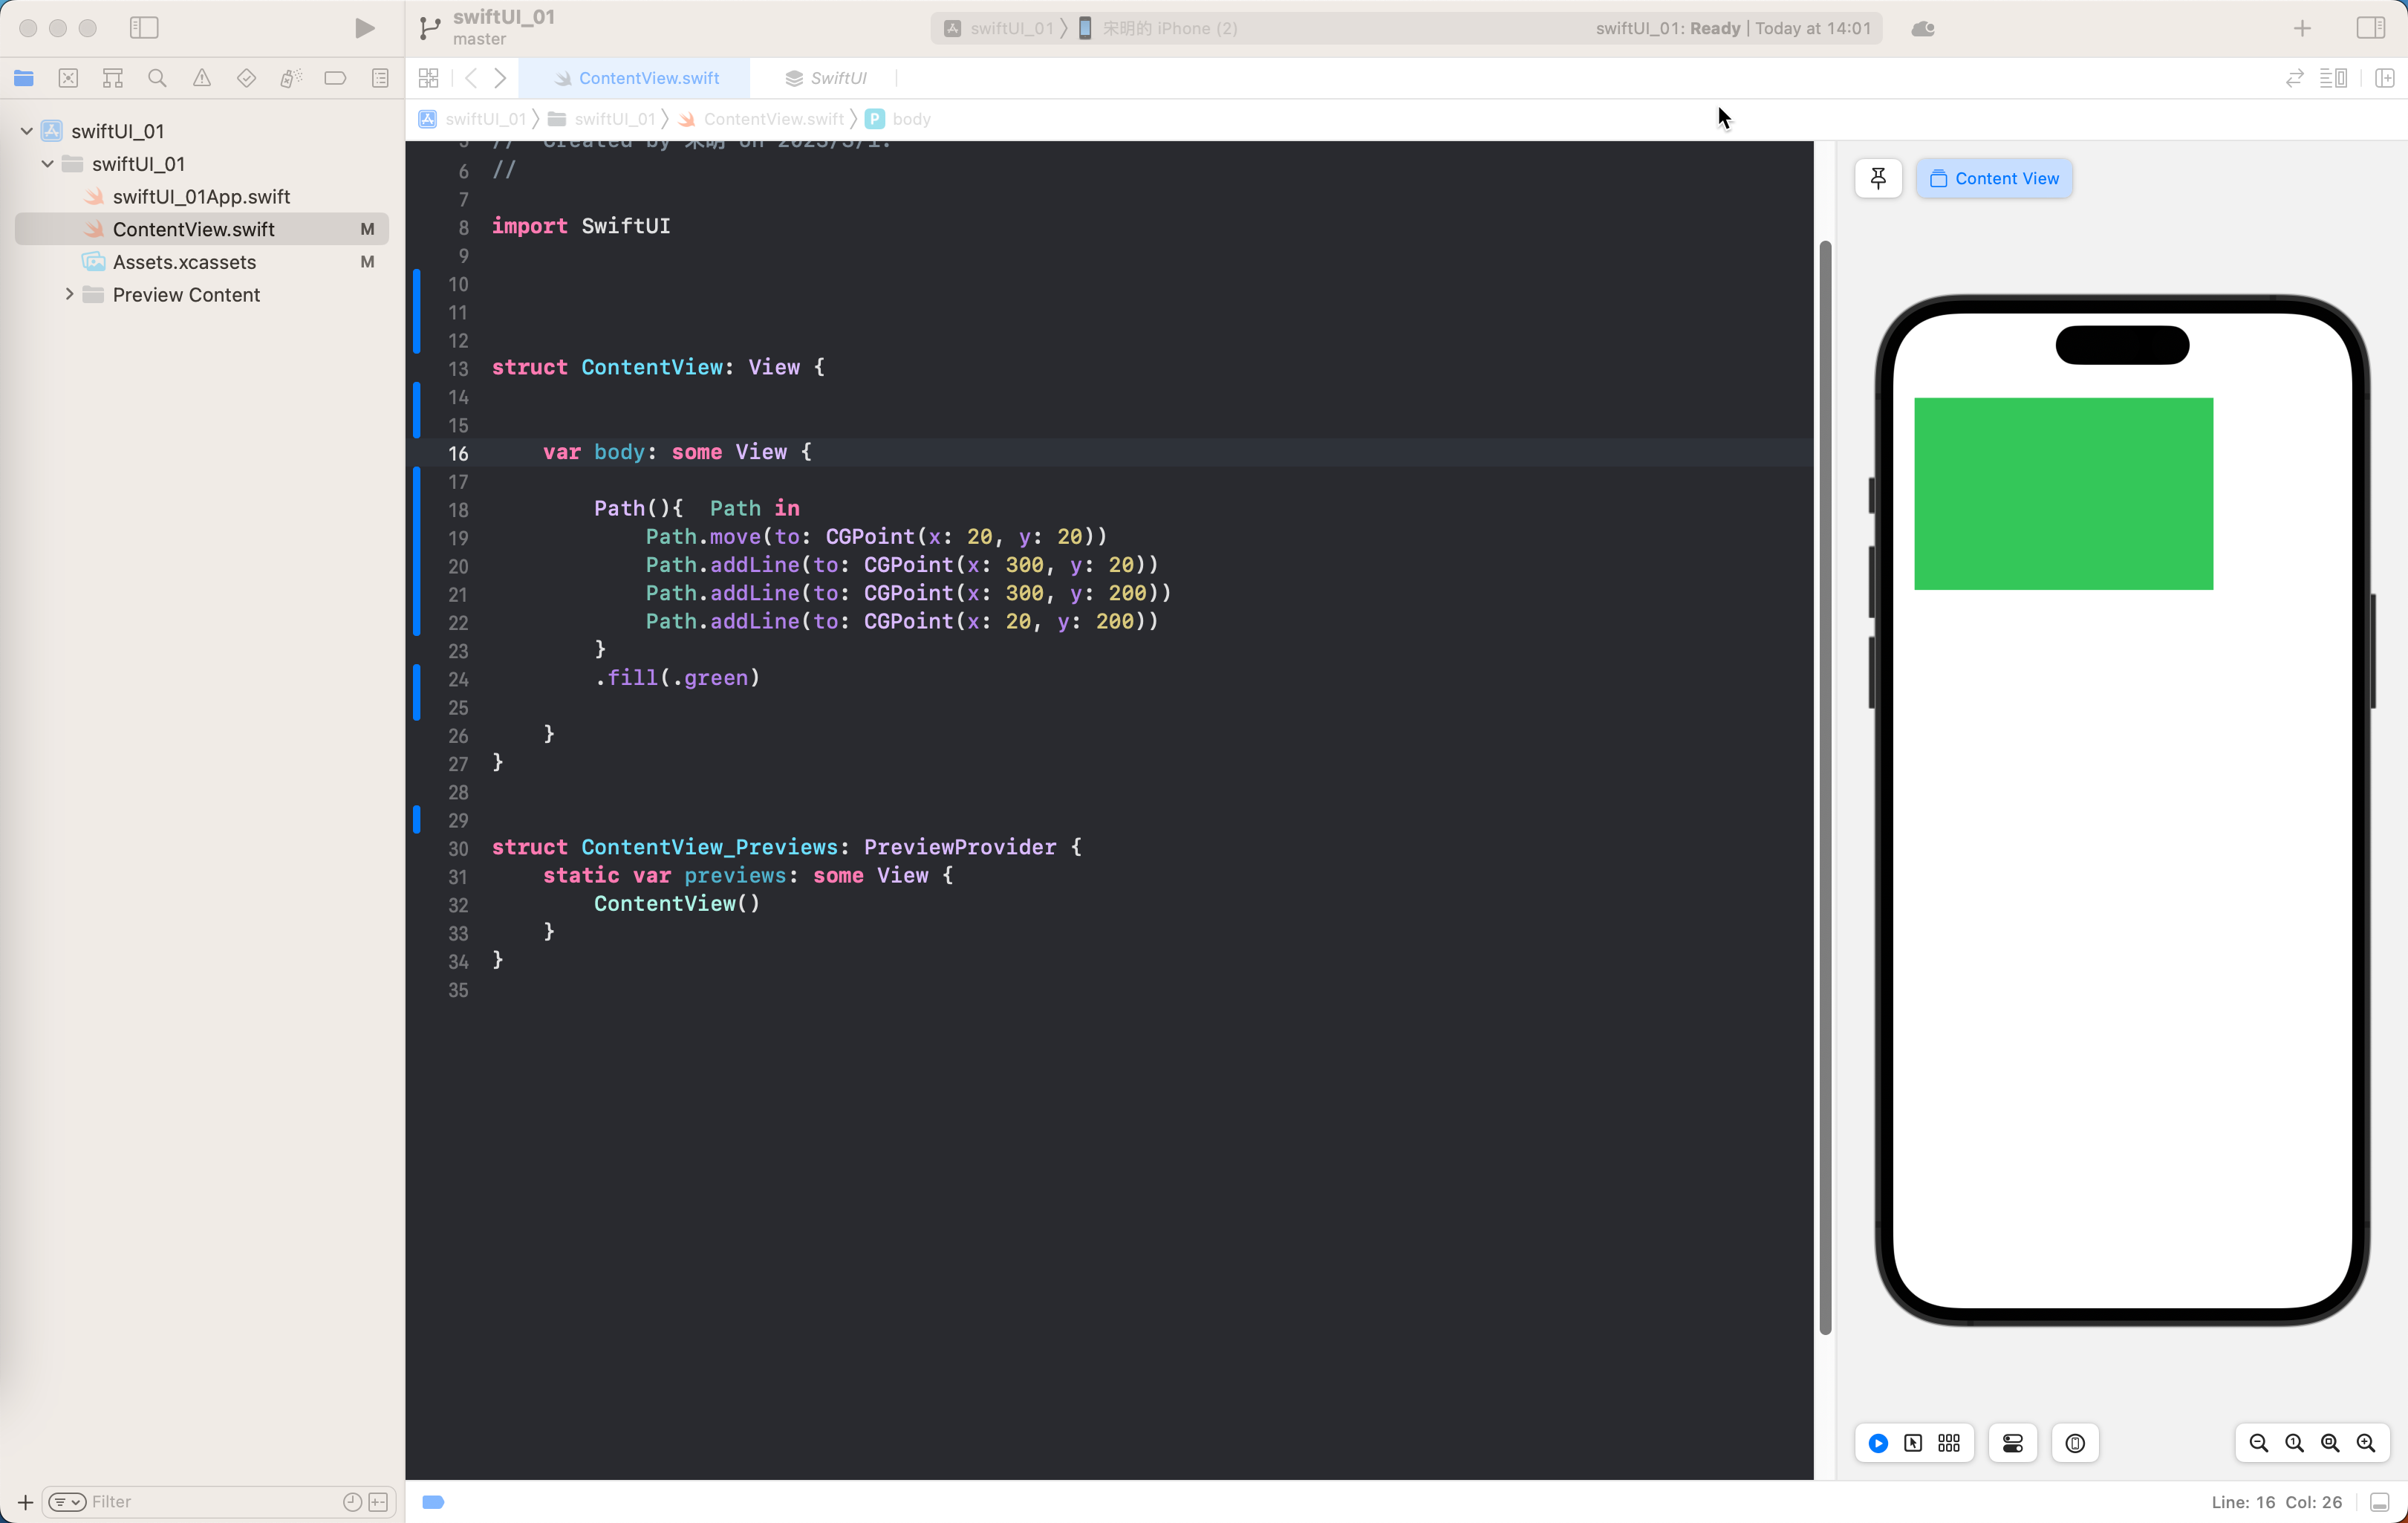
绘制如上矩形只要下面的代码
   Path(){  Path in
            Path.move(to: CGPoint(x: 20, y: 20))
            Path.addLine(to: CGPoint(x: 300, y: 20))
            Path.addLine(to: CGPoint(x: 300, y: 200))
            Path.addLine(to: CGPoint(x: 20, y: 200))
        }
        .fill(.green)
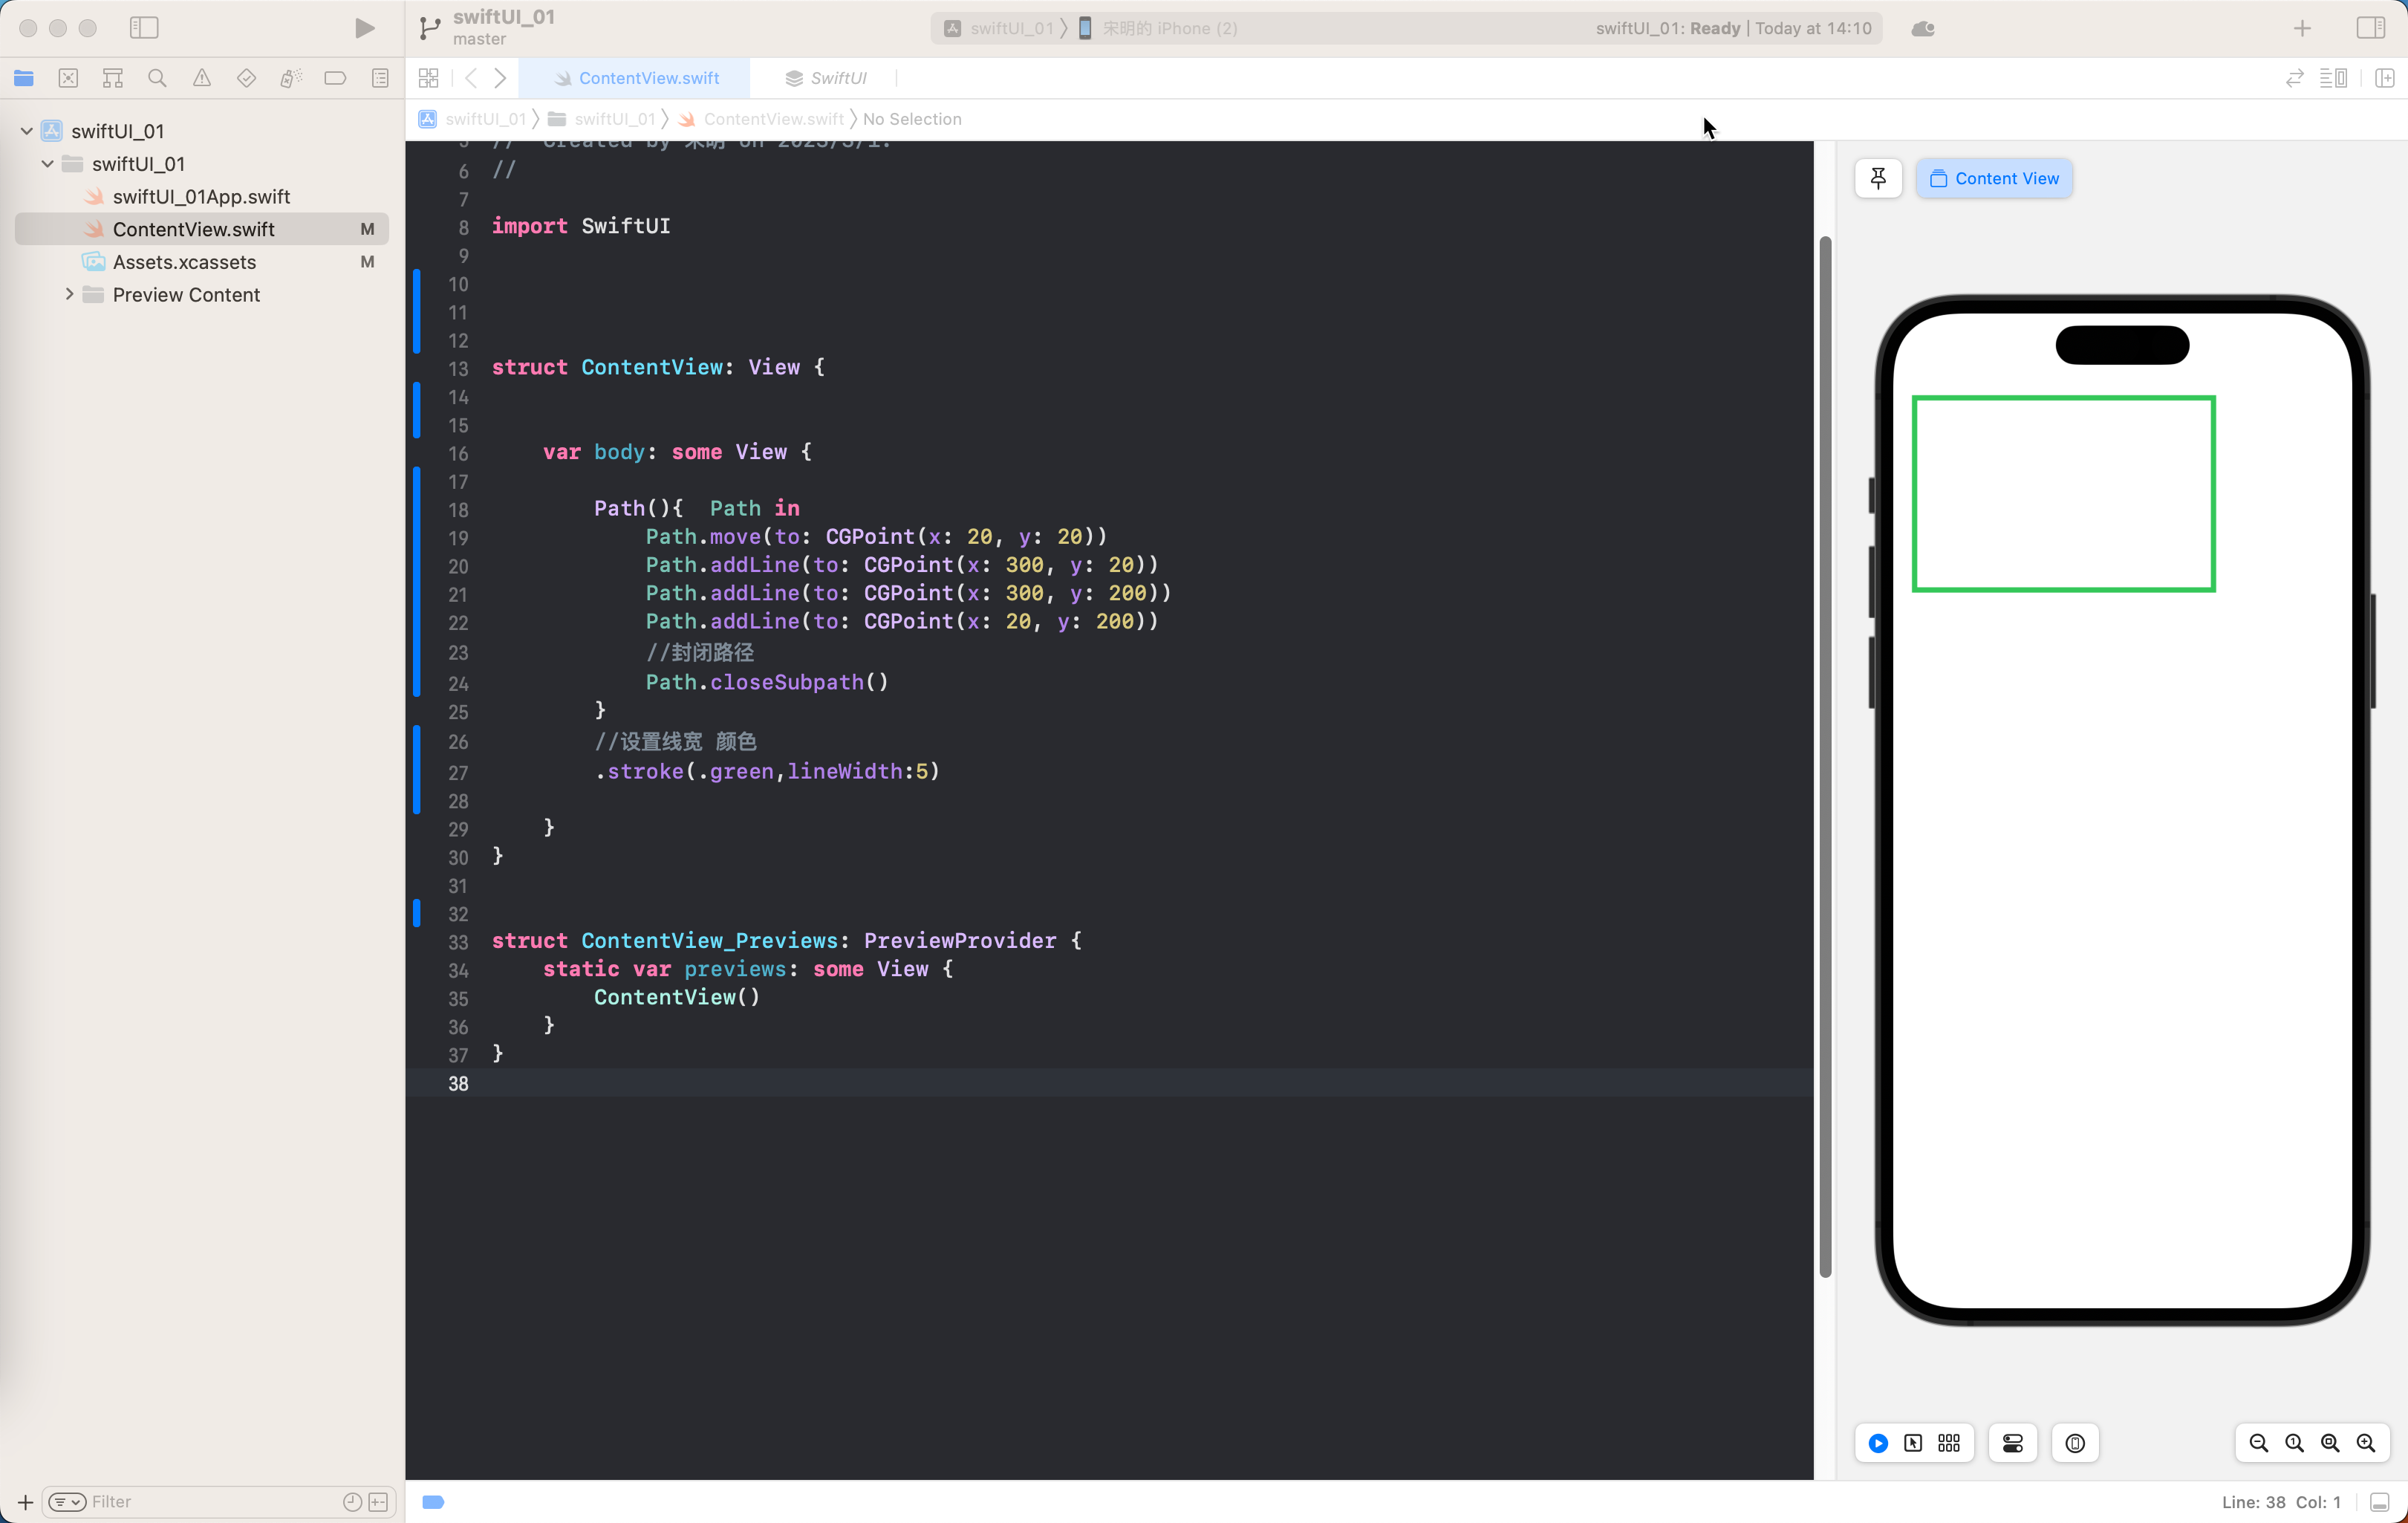
绘制边框形状
       Path(){  Path in
            Path.move(to: CGPoint(x: 20, y: 20))
            Path.addLine(to: CGPoint(x: 300, y: 20))
            Path.addLine(to: CGPoint(x: 300, y: 200))
            Path.addLine(to: CGPoint(x: 20, y: 200))
            //封闭路径
            Path.closeSubpath()
        }
        //设置线宽 颜色
        .stroke(.green,lineWidth:5)
画曲线
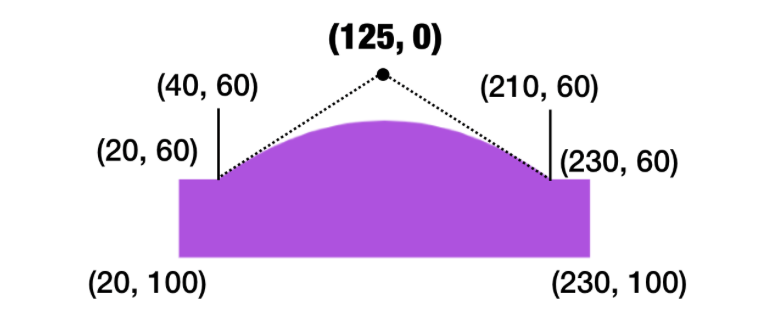
     Path(){  Path in
            Path.move(to: CGPoint(x: 20, y: 20))
            Path.addLine(to: CGPoint(x: 40, y: 20))
            Path.addQuadCurve(to: CGPoint(x: 260, y: 20), control: CGPoint(x: 150, y: 100))
            Path.addLine(to: CGPoint(x: 300, y: 20))
            Path.addLine(to: CGPoint(x: 300, y: 200))
            Path.addLine(to: CGPoint(x: 20, y: 200))

        }
        .fill(.green)
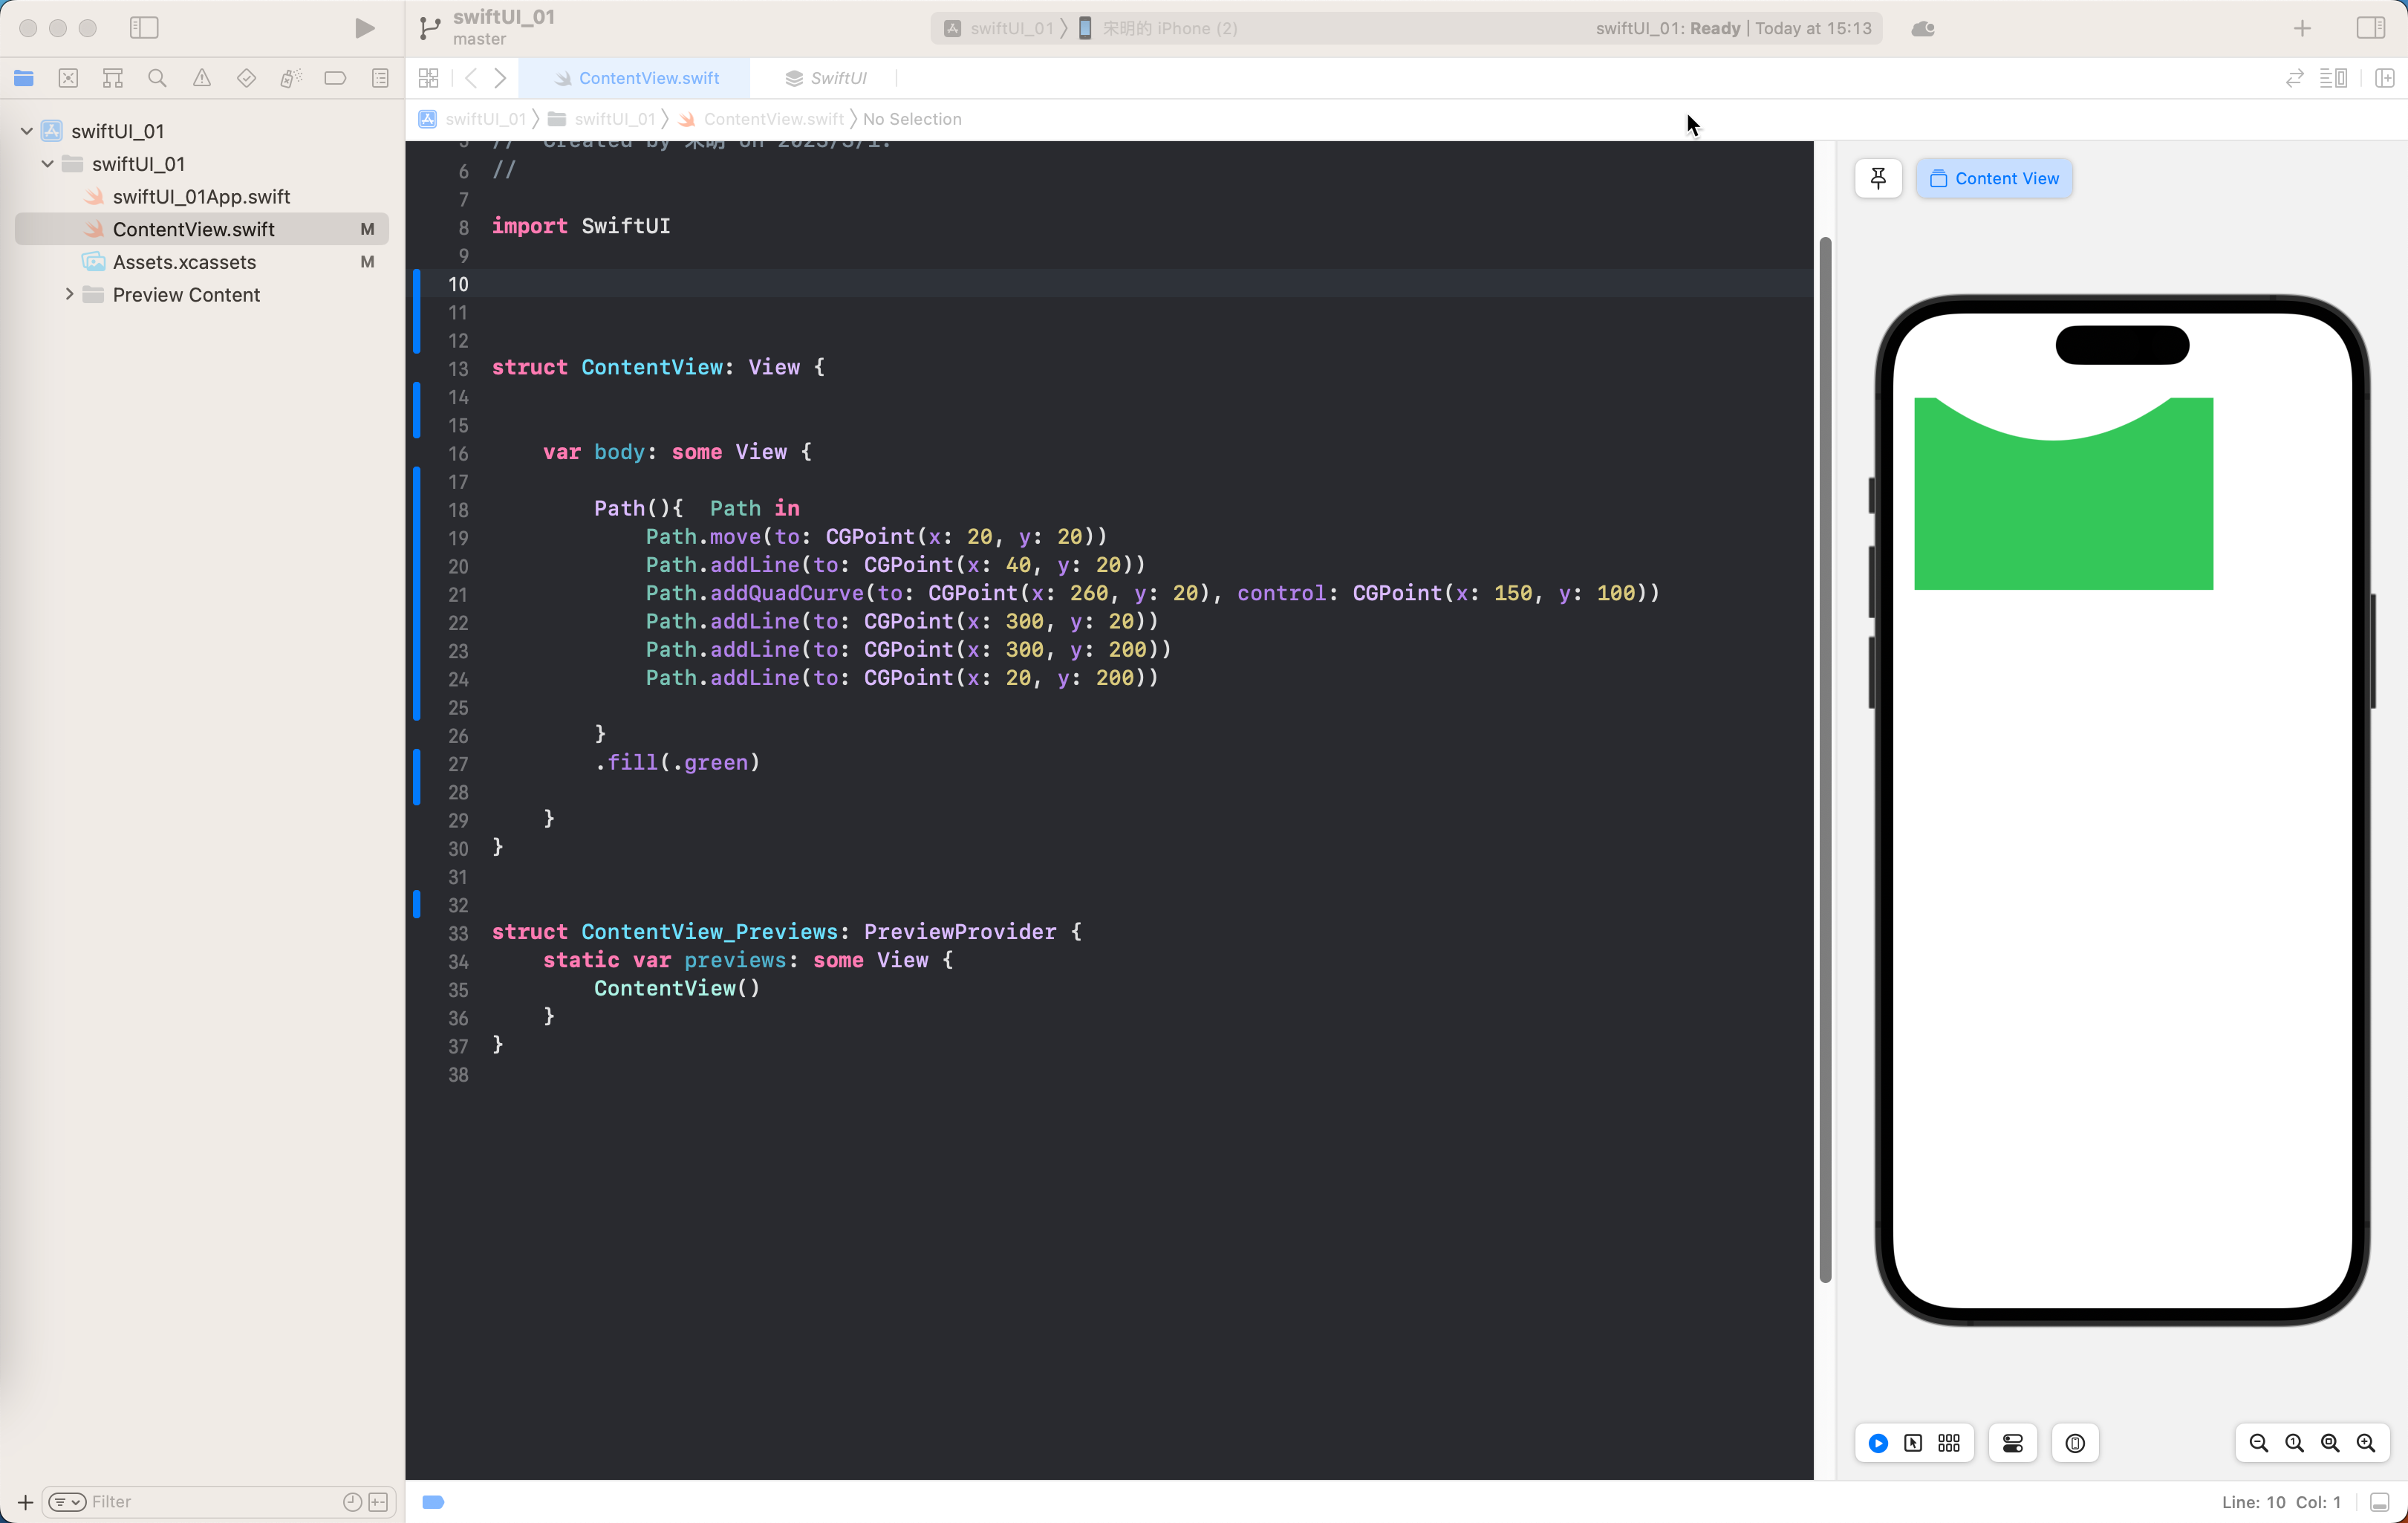
fill 与 stroke 共同使用
       ZStack {
            Path() { path in
                path.move(to: CGPoint(x: 20, y: 60))
                path.addLine(to: CGPoint(x: 40, y: 60))
                path.addQuadCurve(to: CGPoint(x: 210, y: 60), control: CGPoint(x: 125, y: 0))
                path.addLine(to: CGPoint(x: 230, y: 60))
                path.addLine(to: CGPoint(x: 230, y: 100))
                path.addLine(to: CGPoint(x: 20, y: 100))
            }
            .fill(Color.purple)

            Path() { path in
                path.move(to: CGPoint(x: 20, y: 60))
                path.addLine(to: CGPoint(x: 40, y: 60))
                path.addQuadCurve(to: CGPoint(x: 210, y: 60), control: CGPoint(x: 125, y: 0))
                path.addLine(to: CGPoint(x: 230, y: 60))
                path.addLine(to: CGPoint(x: 230, y: 100))
                path.addLine(to: CGPoint(x: 20, y: 100))
                path.closeSubpath()
            }
            .stroke(Color.black, lineWidth: 5)
        }
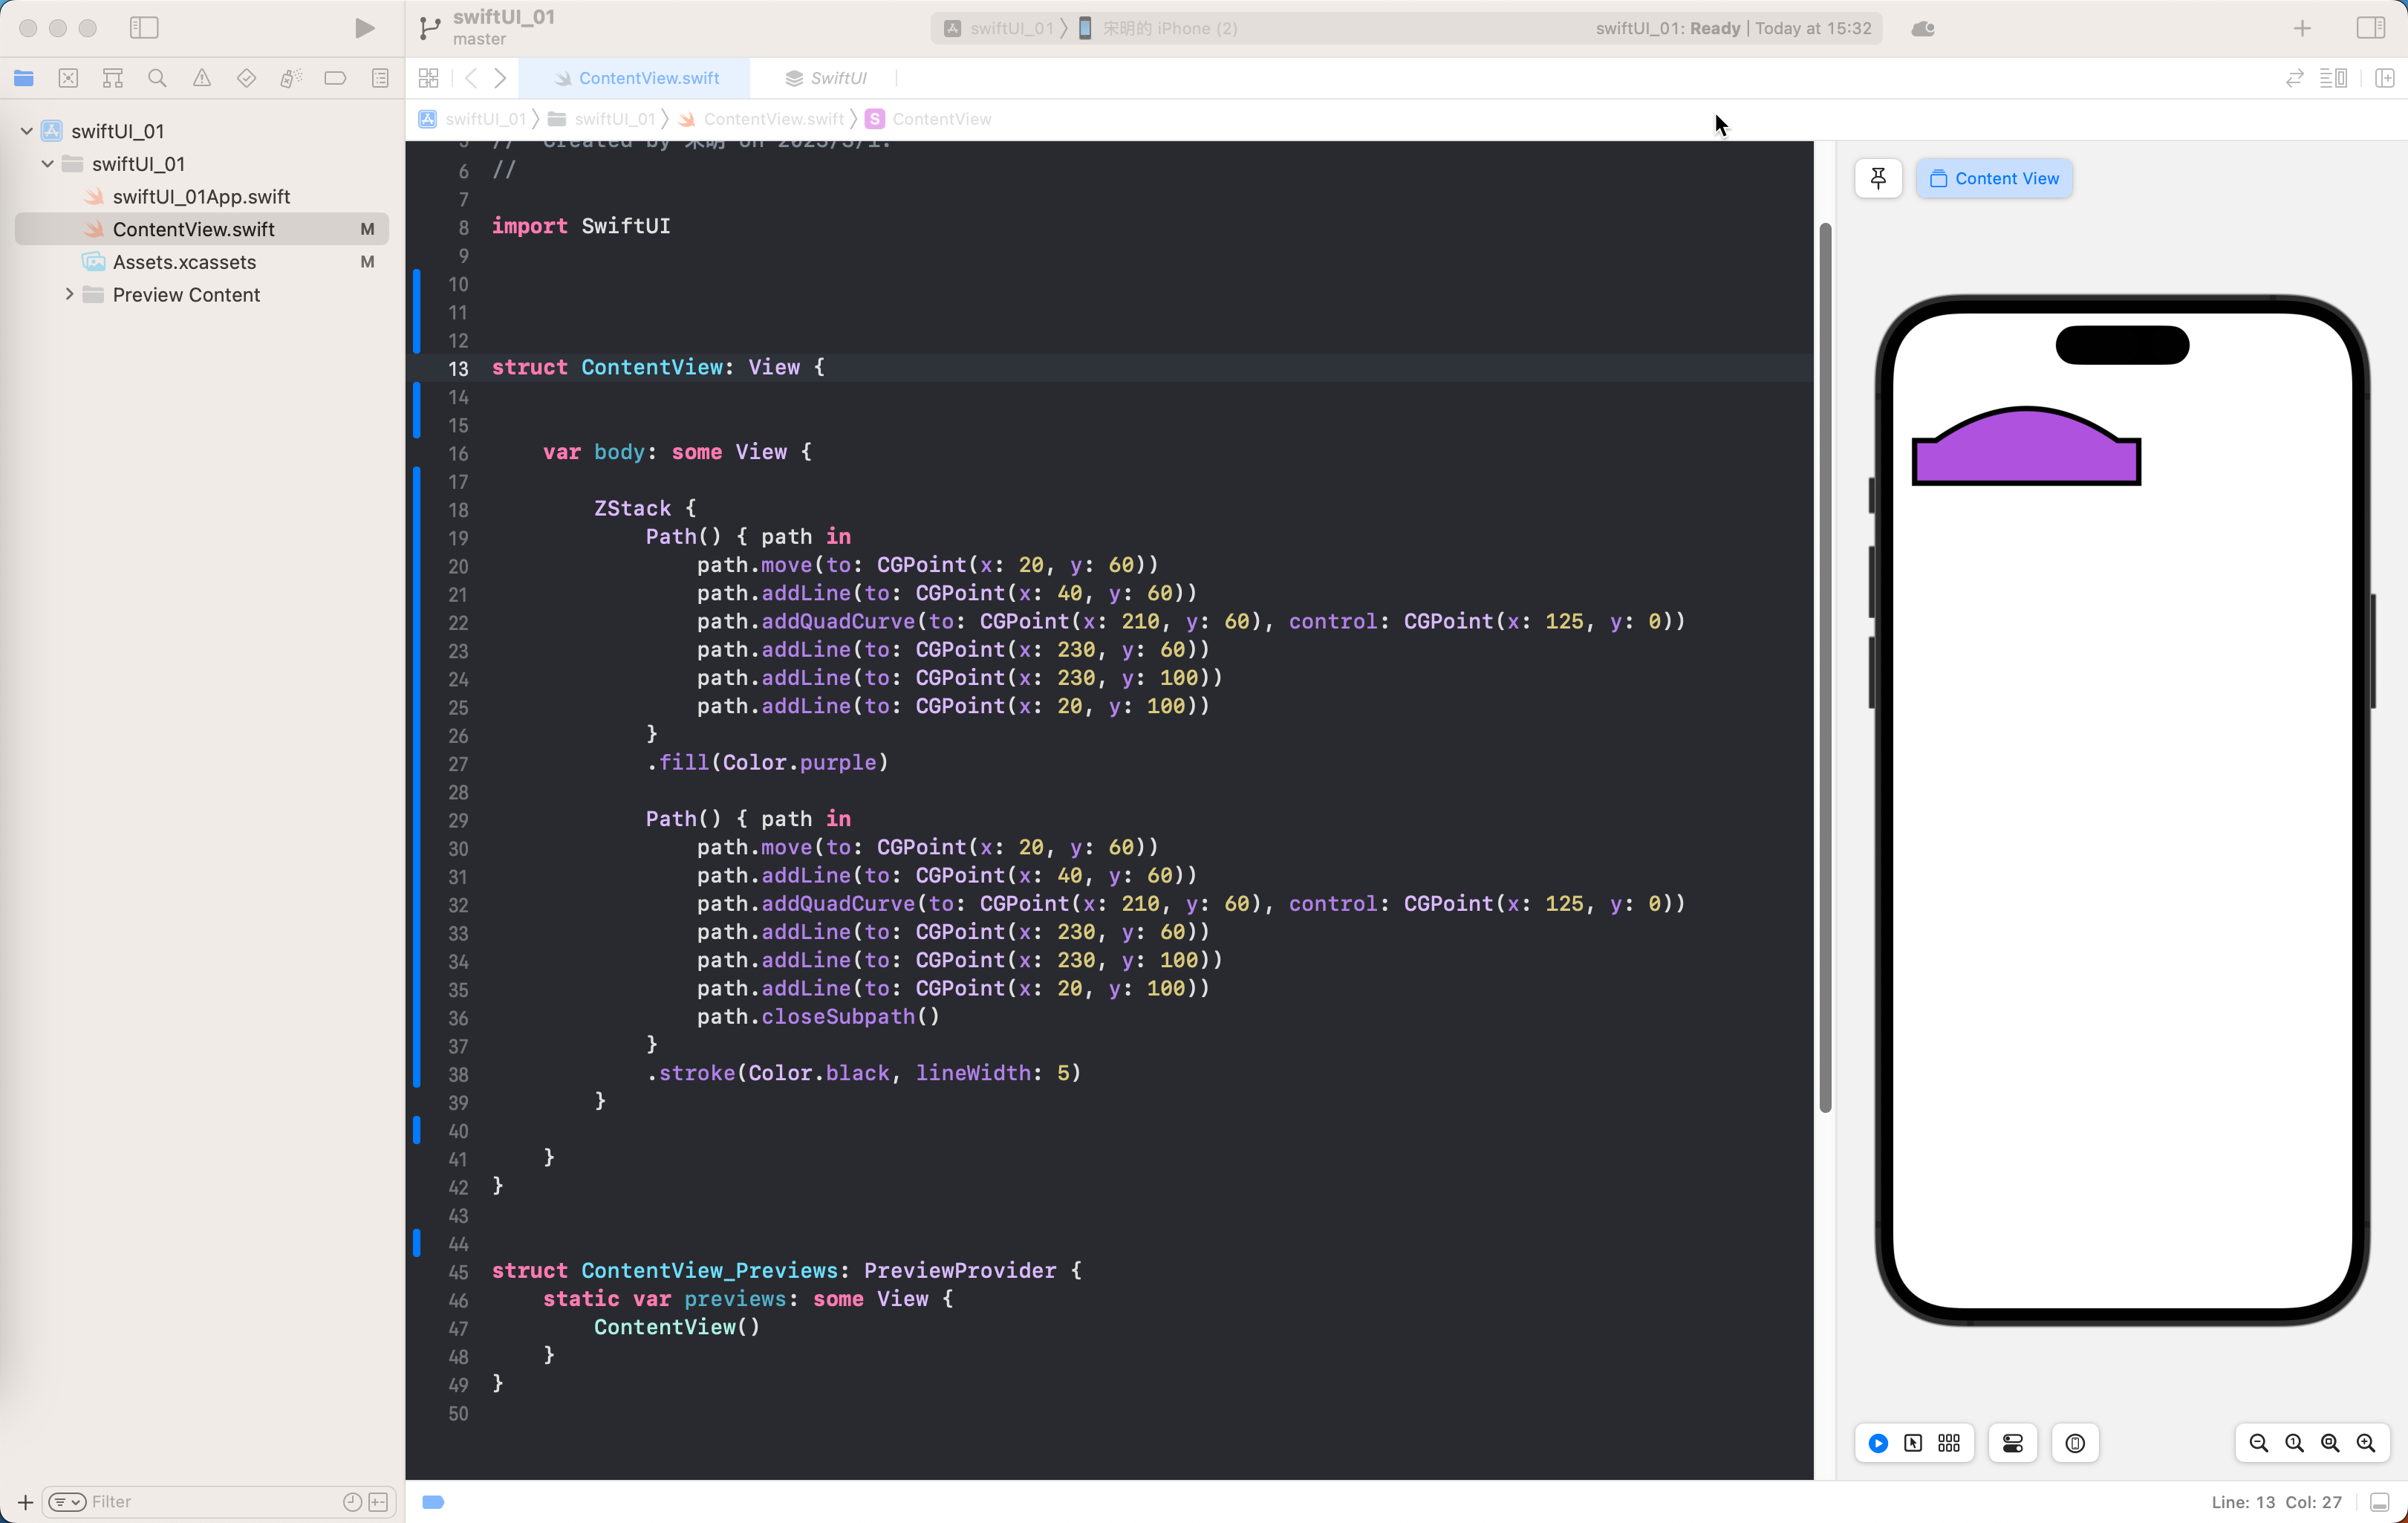
画饼图
center - 中心点
radius - 半径
startAngle - 起始角度
endAngle - 结束角度
cloclwise - 画圆弧的方向
/*
center - 中心点
radius - 半径
startAngle - 起始角度
endAngle - 结束角度
cloclwise - 画圆弧的方向
*/

Path() { path in
            path.move(to: CGPoint(x: 200, y: 200))
            path.addArc(center: .init(x: 200, y: 200), radius: 100, startAngle: .degrees(0), endAngle: .degrees(90), clockwise: true)

        }
        .fill(Color.purple)
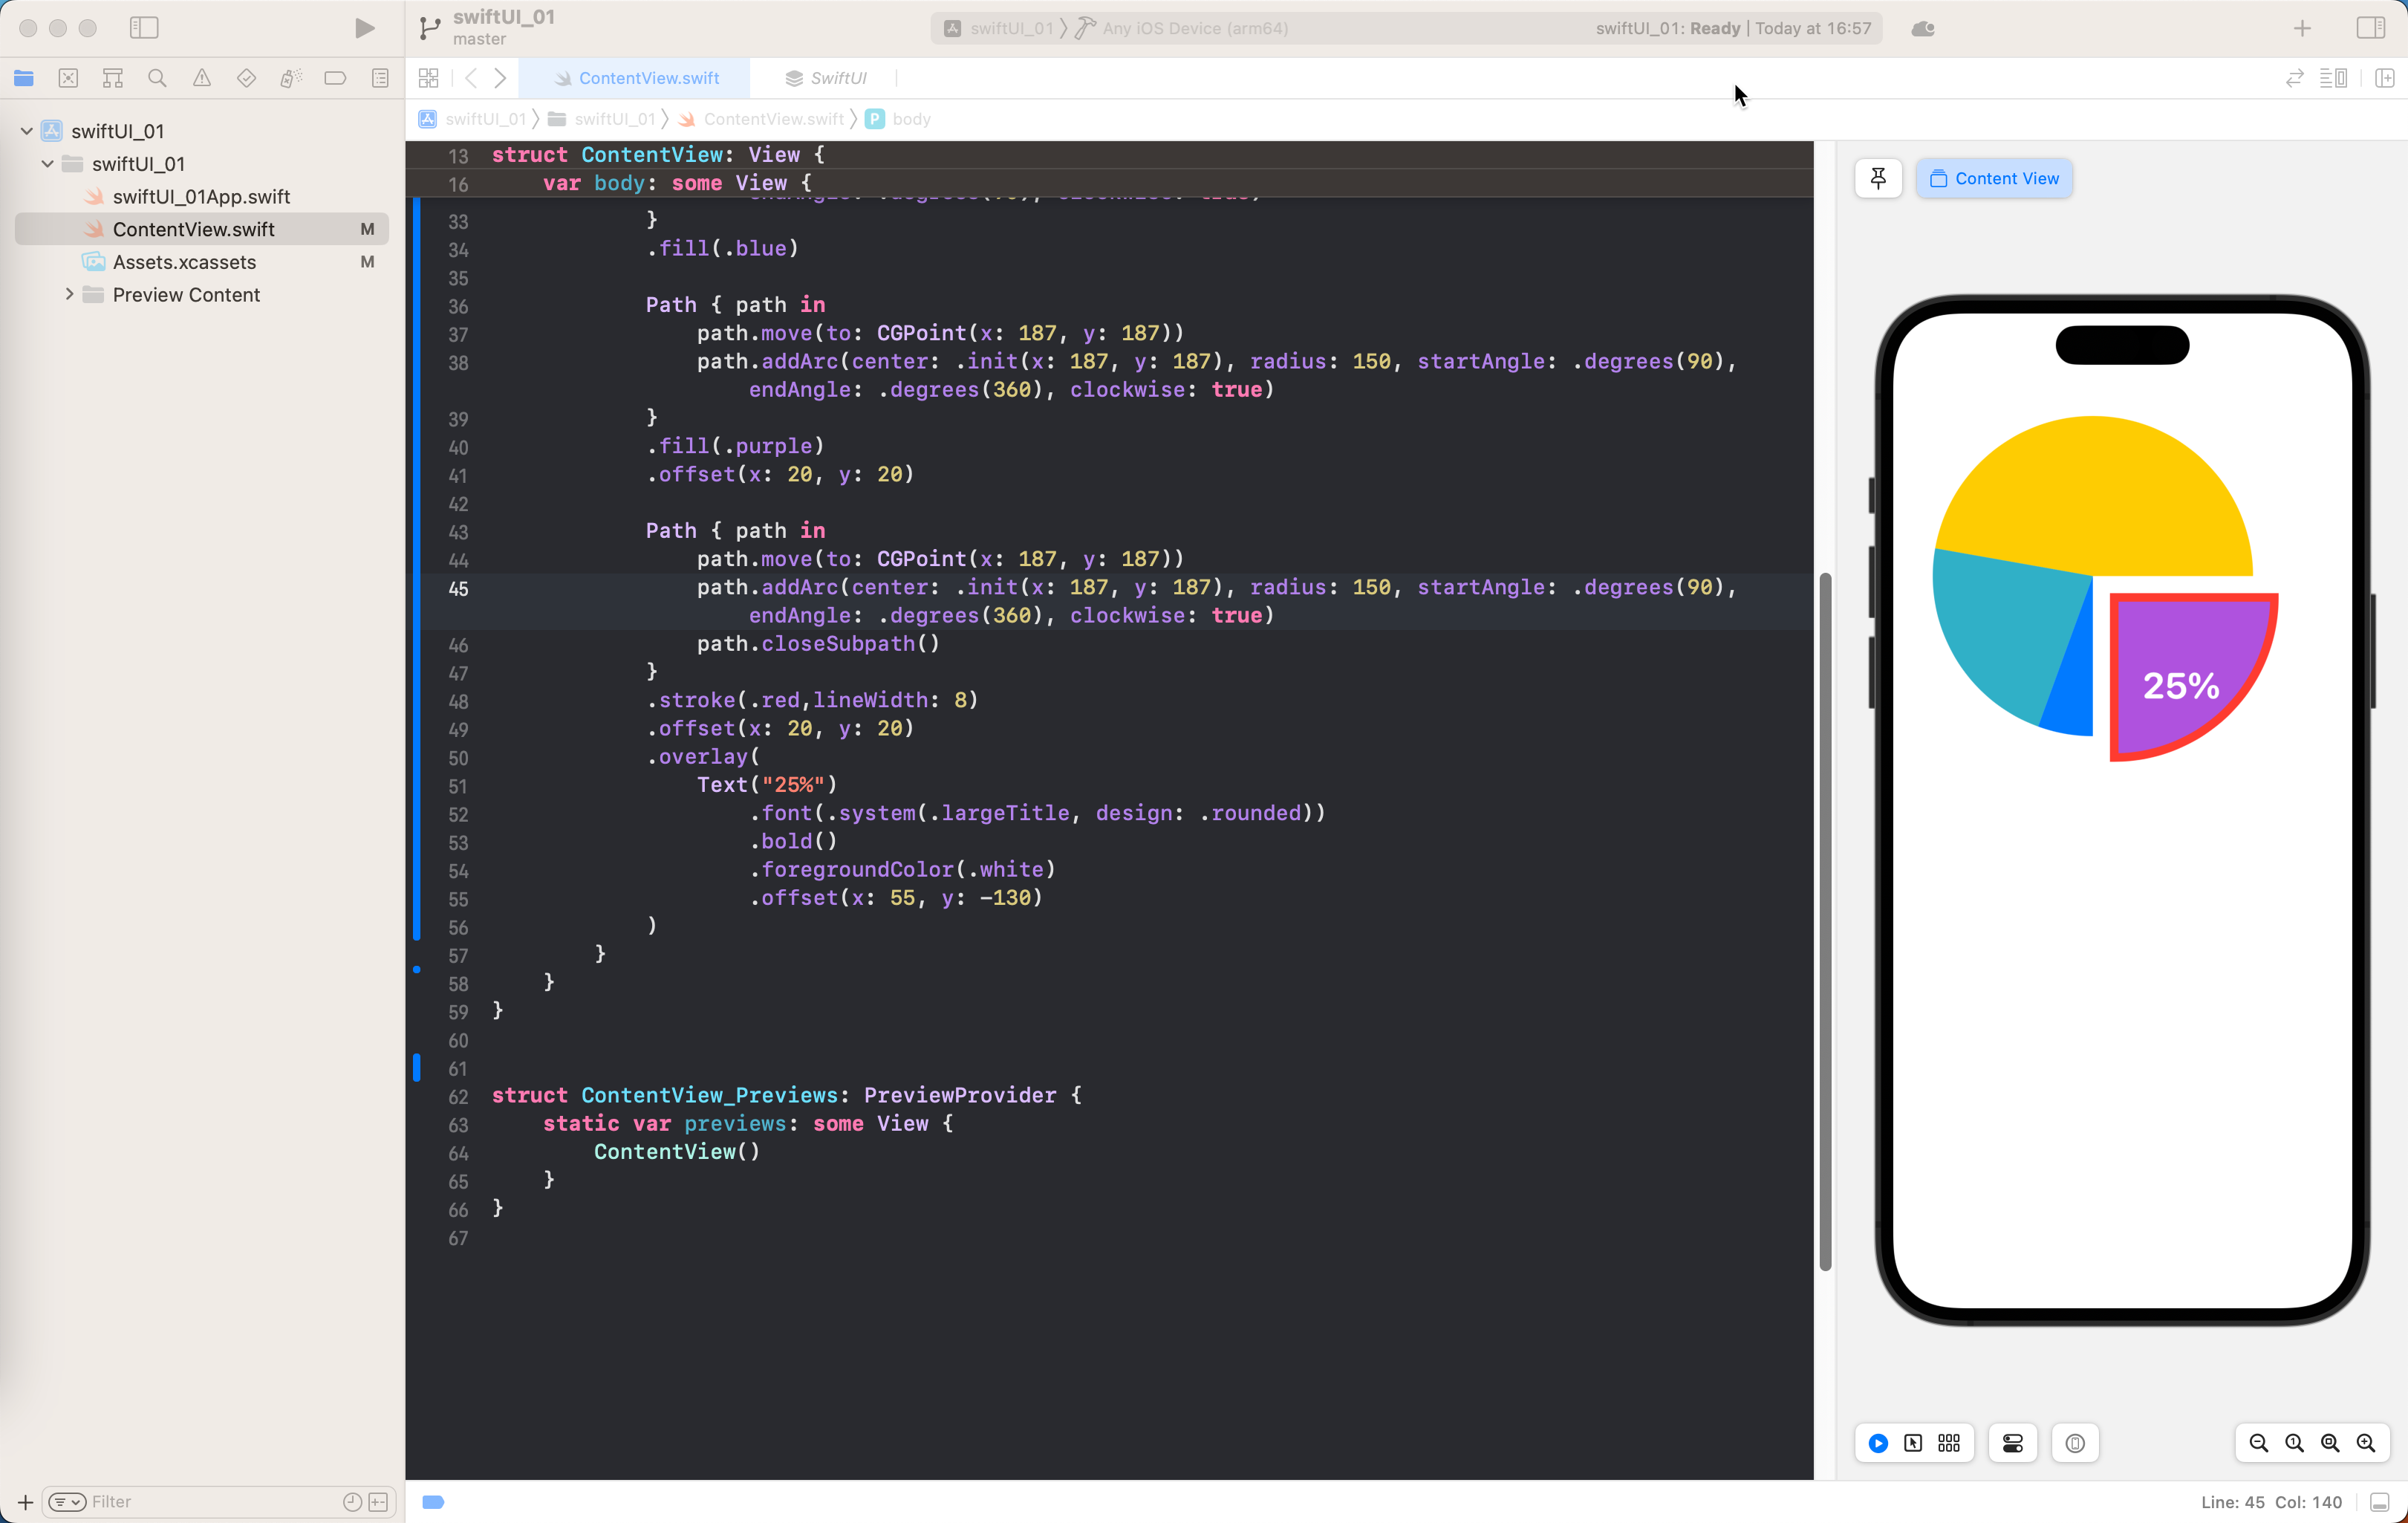
通过ZStack 叠加多个饼状图
ZStack {
            Path { path in
                path.move(to: CGPoint(x: 187, y: 187))
                path.addArc(center: .init(x: 187, y: 187), radius: 150, startAngle: .degrees(0), endAngle: .degrees(190), clockwise: true)
            }
            .fill(.yellow)

            Path { path in
                path.move(to: CGPoint(x: 187, y: 187))
                path.addArc(center: .init(x: 187, y: 187), radius: 150, startAngle: .degrees(190), endAngle: .degrees(110), clockwise: true)
            }
            .fill(.teal)

            Path { path in
                path.move(to: CGPoint(x: 187, y: 187))
                path.addArc(center: .init(x: 187, y: 187), radius: 150, startAngle: .degrees(110), endAngle: .degrees(90), clockwise: true)
            }
            .fill(.blue)

            Path { path in
                path.move(to: CGPoint(x: 187, y: 187))
                path.addArc(center: .init(x: 187, y: 187), radius: 150, startAngle: .degrees(90), endAngle: .degrees(360), clockwise: true)
            }
            .fill(.purple)
    		//偏移饼
            .offset(x: 20, y: 20)
            //画线
            Path { path in
                path.move(to: CGPoint(x: 187, y: 187))
                path.addArc(center: .init(x: 187, y: 187), radius: 150, startAngle: .degrees(90), endAngle: .degrees(360), clockwise: true)
                path.closeSubpath()
            }
            .stroke(.red,lineWidth: 8)
            .offset(x: 20, y: 20)
            .overlay(
                Text("25%")
                    .font(.system(.largeTitle, design: .rounded))
                    .bold()
                    .foregroundColor(.white)
                    .offset(x: 55, y: -130)
            )
        }
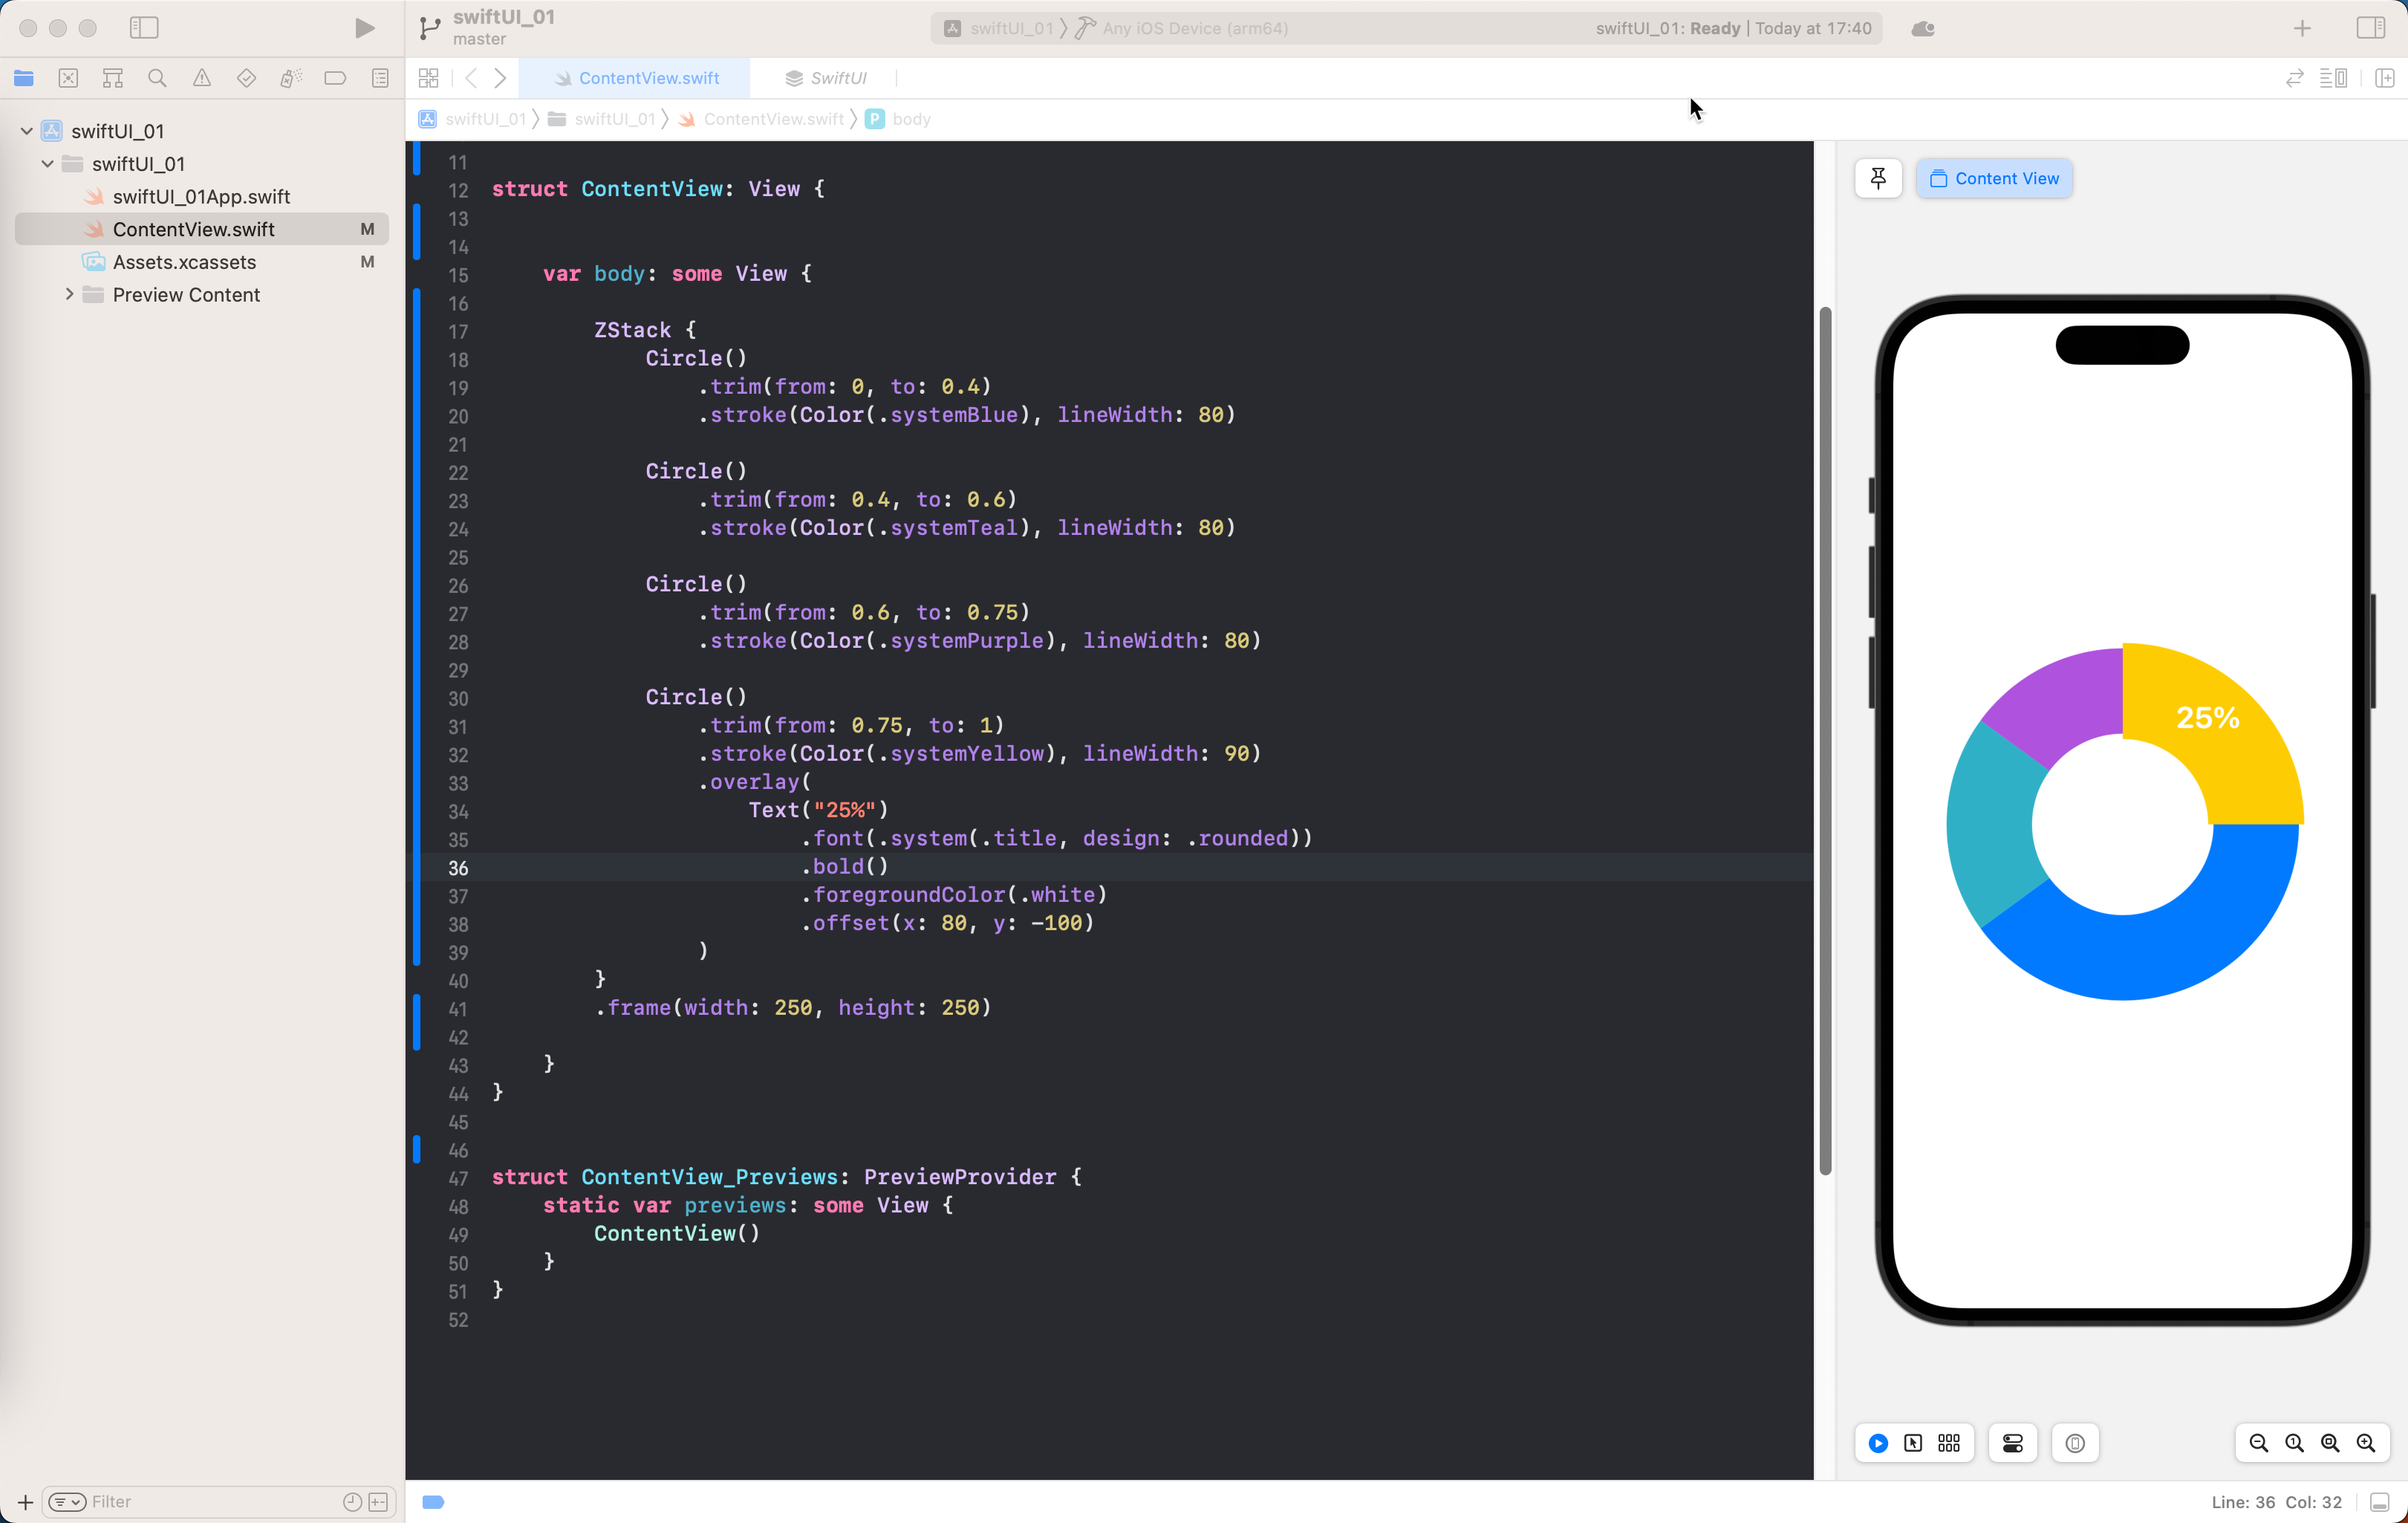
圆圈饼图
        ZStack {
            Circle()
                .trim(from: 0, to: 0.4)
                .stroke(Color(.systemBlue), lineWidth: 80)

            Circle()
                .trim(from: 0.4, to: 0.6)
                .stroke(Color(.systemTeal), lineWidth: 80)

            Circle()
                .trim(from: 0.6, to: 0.75)
                .stroke(Color(.systemPurple), lineWidth: 80)

            Circle()
                .trim(from: 0.75, to: 1)
                .stroke(Color(.systemYellow), lineWidth: 90)
                .overlay(
                    Text("25%")
                        .font(.system(.title, design: .rounded))
                        .bold()
                        .foregroundColor(.white)
                        .offset(x: 80, y: -100)
                )
        }
        .frame(width: 250, height: 250)
